Note
Go to the end to download the full example code.
Selecting a Region of Interest (ROI)
This example looks at the current core functionality of the Region of Interest (ROI) Selection Firsly we’ll need to import pyvale itself.
from pathlib import Path

# pyvale modules
import pyvale.dataset as dataset
import pyvale.dic as dic
We’ll begin by selecting our Region of Interest (ROI) using the interactive selection tool. First, we create an instance of the ROI class. We pass a reference image to it, which is displayed as the underlay during ROI selection.
ref_img = dataset.dic_plate_with_hole_ref()
roi = dic.RegionOfInterest(ref_image=ref_img)
roi.interactive_selection(subset_size=31)

# create a directory for the the different outputs
output_path = Path.cwd() / "pyvale-output"
if not output_path.is_dir():
    output_path.mkdir(parents=True, exist_ok=True)
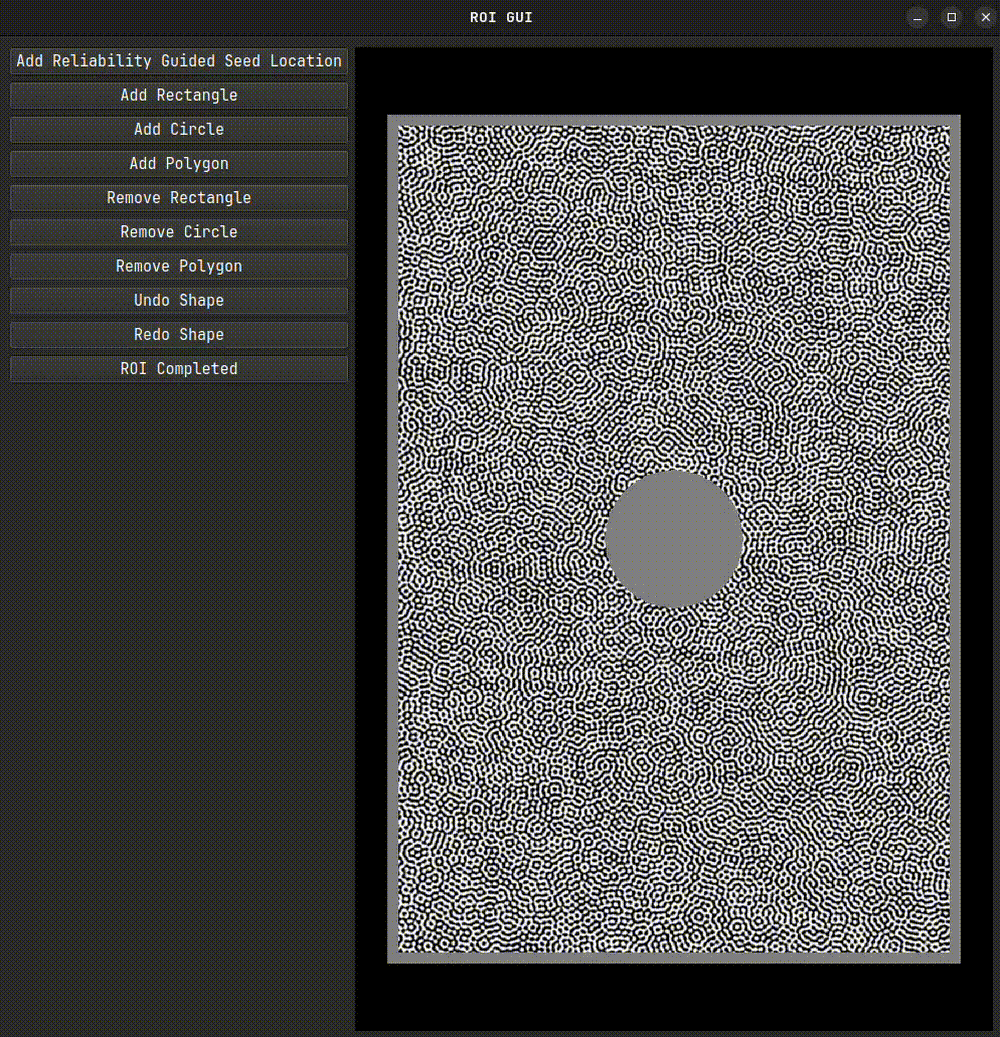
After closing the interactive tool, a mask and a set of seed coordinates will be generated. These can be used directly in the DIC engine. If you plan to reuse the ROI, it’s a good idea to save it. For very large images, set binary=True to reduce file size and speed up saving.
roi_file = output_path / "roi.dat"
roi.save_array(filename=roi_file,binary=False)
To reuse the saved ROI mask in the future, load it using:
roi.read_array(filename=roi_file,binary=False)
If you are loading a previously saved ROI, you may want to visualize it overlaid on the reference image to verify it before proceeding with correlation.
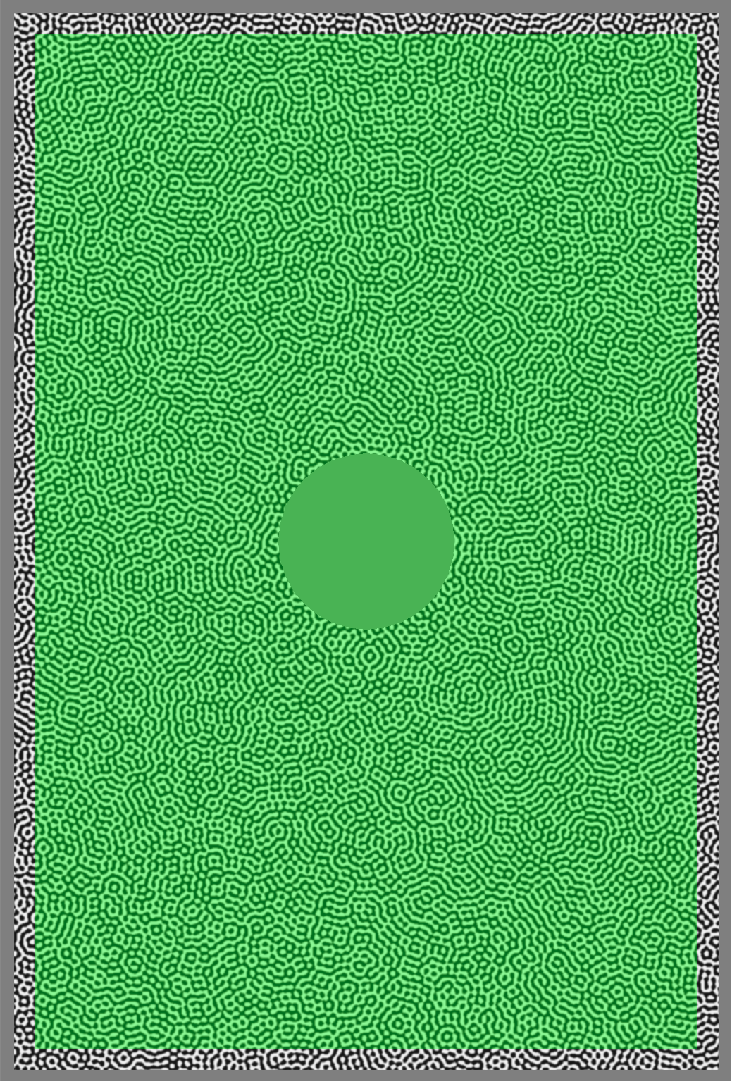
There are also programmatic ways to define an ROI. For example, to exclude a boundary region and keep only the central part:
roi.reset_mask()
roi.rect_boundary(left=50,right=50,bottom=50,top=50)
boundary_img = output_path / "rect_boundary.tiff"
roi.save_image(boundary_img)
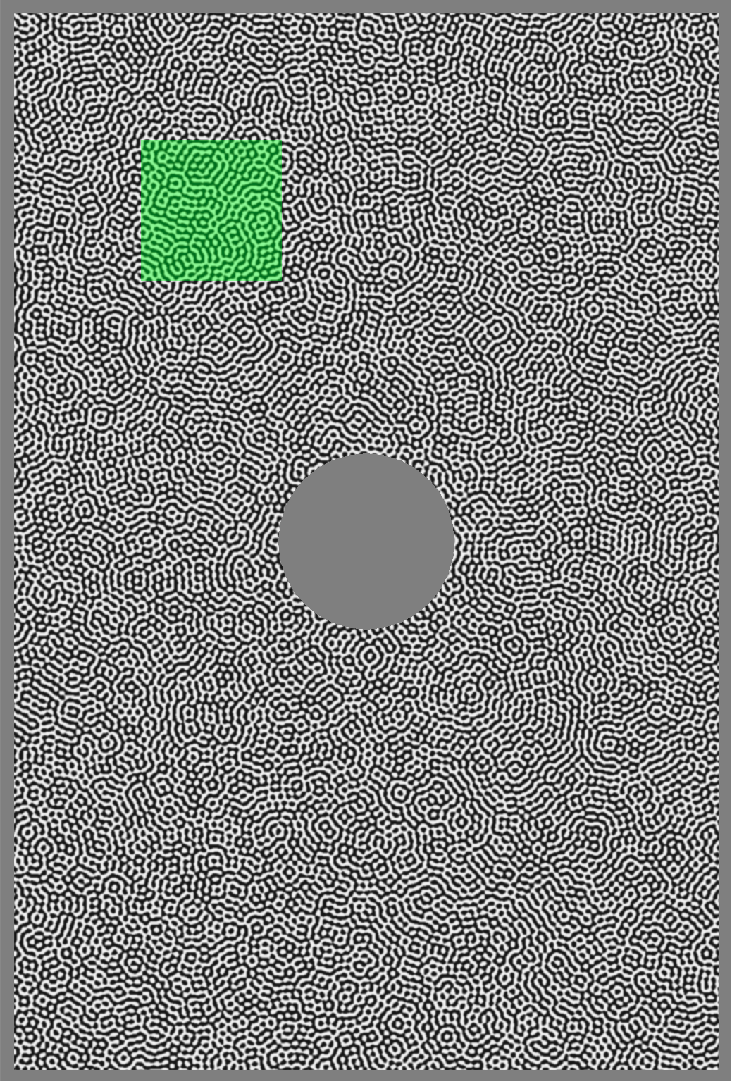
This excludes 50 pixels along each edge of the image from the ROI. Alternatively, to define a specific rectangular region:
roi.reset_mask()
roi.rect_region(x=200,y=200,size_x=200,size_y=200)
region_img = output_path / "rect_region.tiff"
roi.save_image(region_img)
|
|
The rect_region example above creates an ROI starting at pixel coordinates (200, 200) with a size of 200×200 pixels.
You can also manually modify the ROI mask. A good starting point is: roi.rect_boundary(0, 0, 0, 0) — this sets the ROI to include the full image. From there, you can manipulate roi.mask as you would any other 2D NumPy array.